
Creating a digital spreadsheet by hand can certainly be tedious, especially if you're copying a printed paper table word for word, number for number. Instead of typing information that's already there, however, use Microsoft Excel on Android or iOS to snap a photo of that printed chart and import it directly into your digital one.
Microsoft introduced its convenient photo-to-chart feature in the Android version of Excel in March 2019, announcing at the time its intention to add functionality to iOS as well. It seems that time has come, as the company included the feature in an update to iPhones on May 29. If you can't follow along below, you may not have the update yet — keep checking for Excel updates so you can get in on the action too.
- Don't Miss: The 5 Best Free Email Clients for iOS
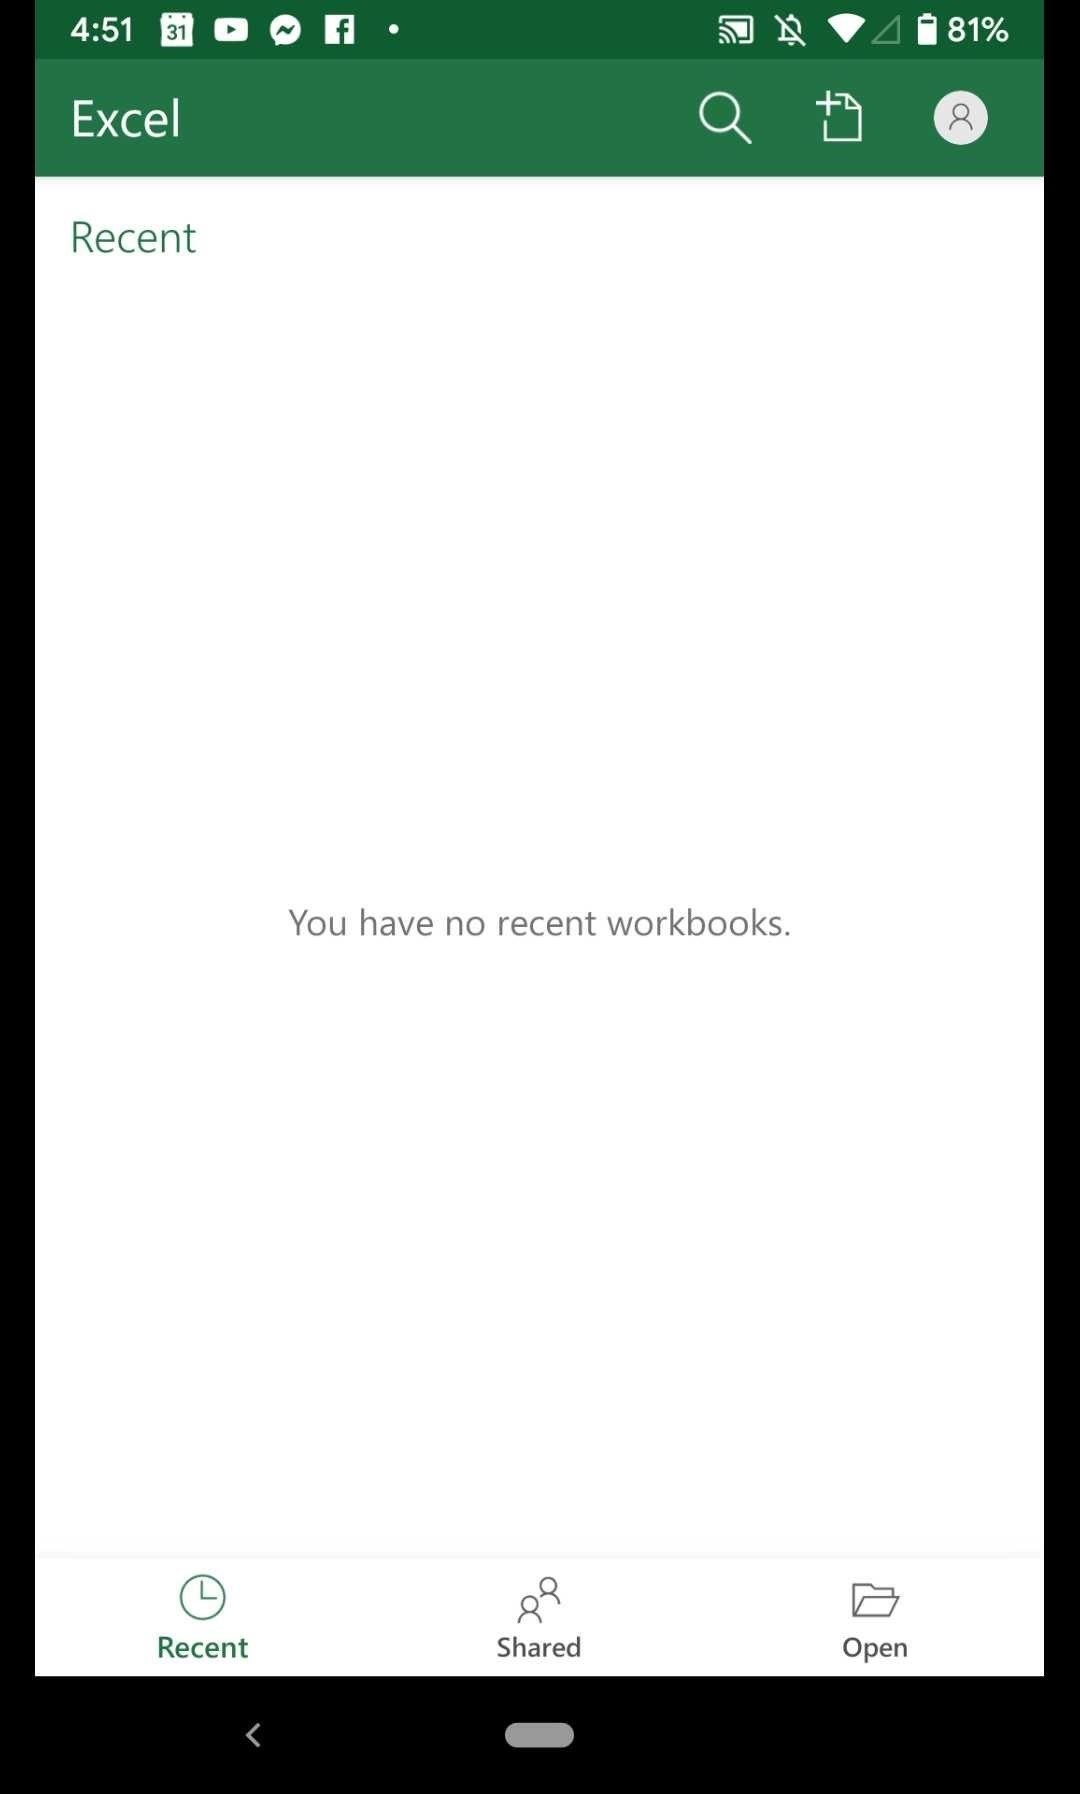
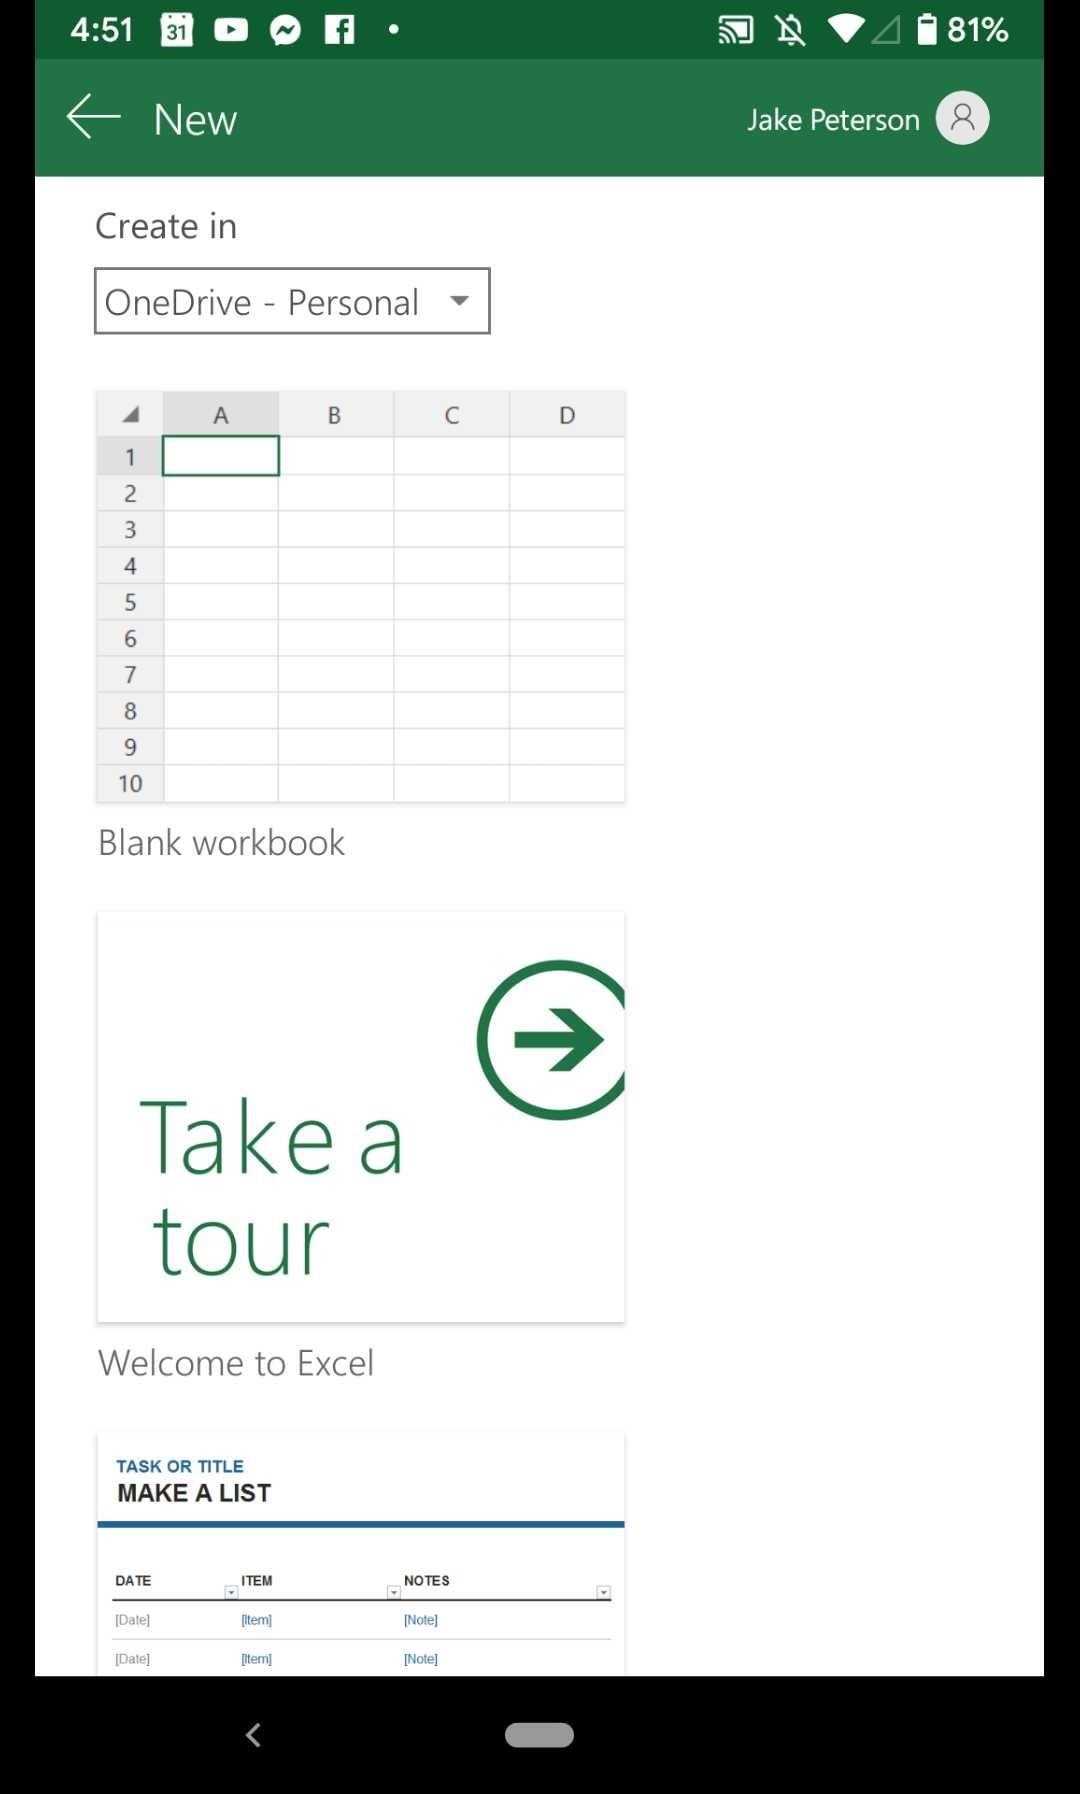
Step 1: Open a Spreadsheet
To access the photo tool, you'll need to open an active spreadsheet in Excel. You can tap any existing spreadsheet in the "Recent" tab or locate one from your various folders in the "Open" tab. You can also start a new spreadsheet by tapping the "New" tab on iOS or the + spreadsheet icon in the top right on Android.
Step 2: Snap the Paper Chart
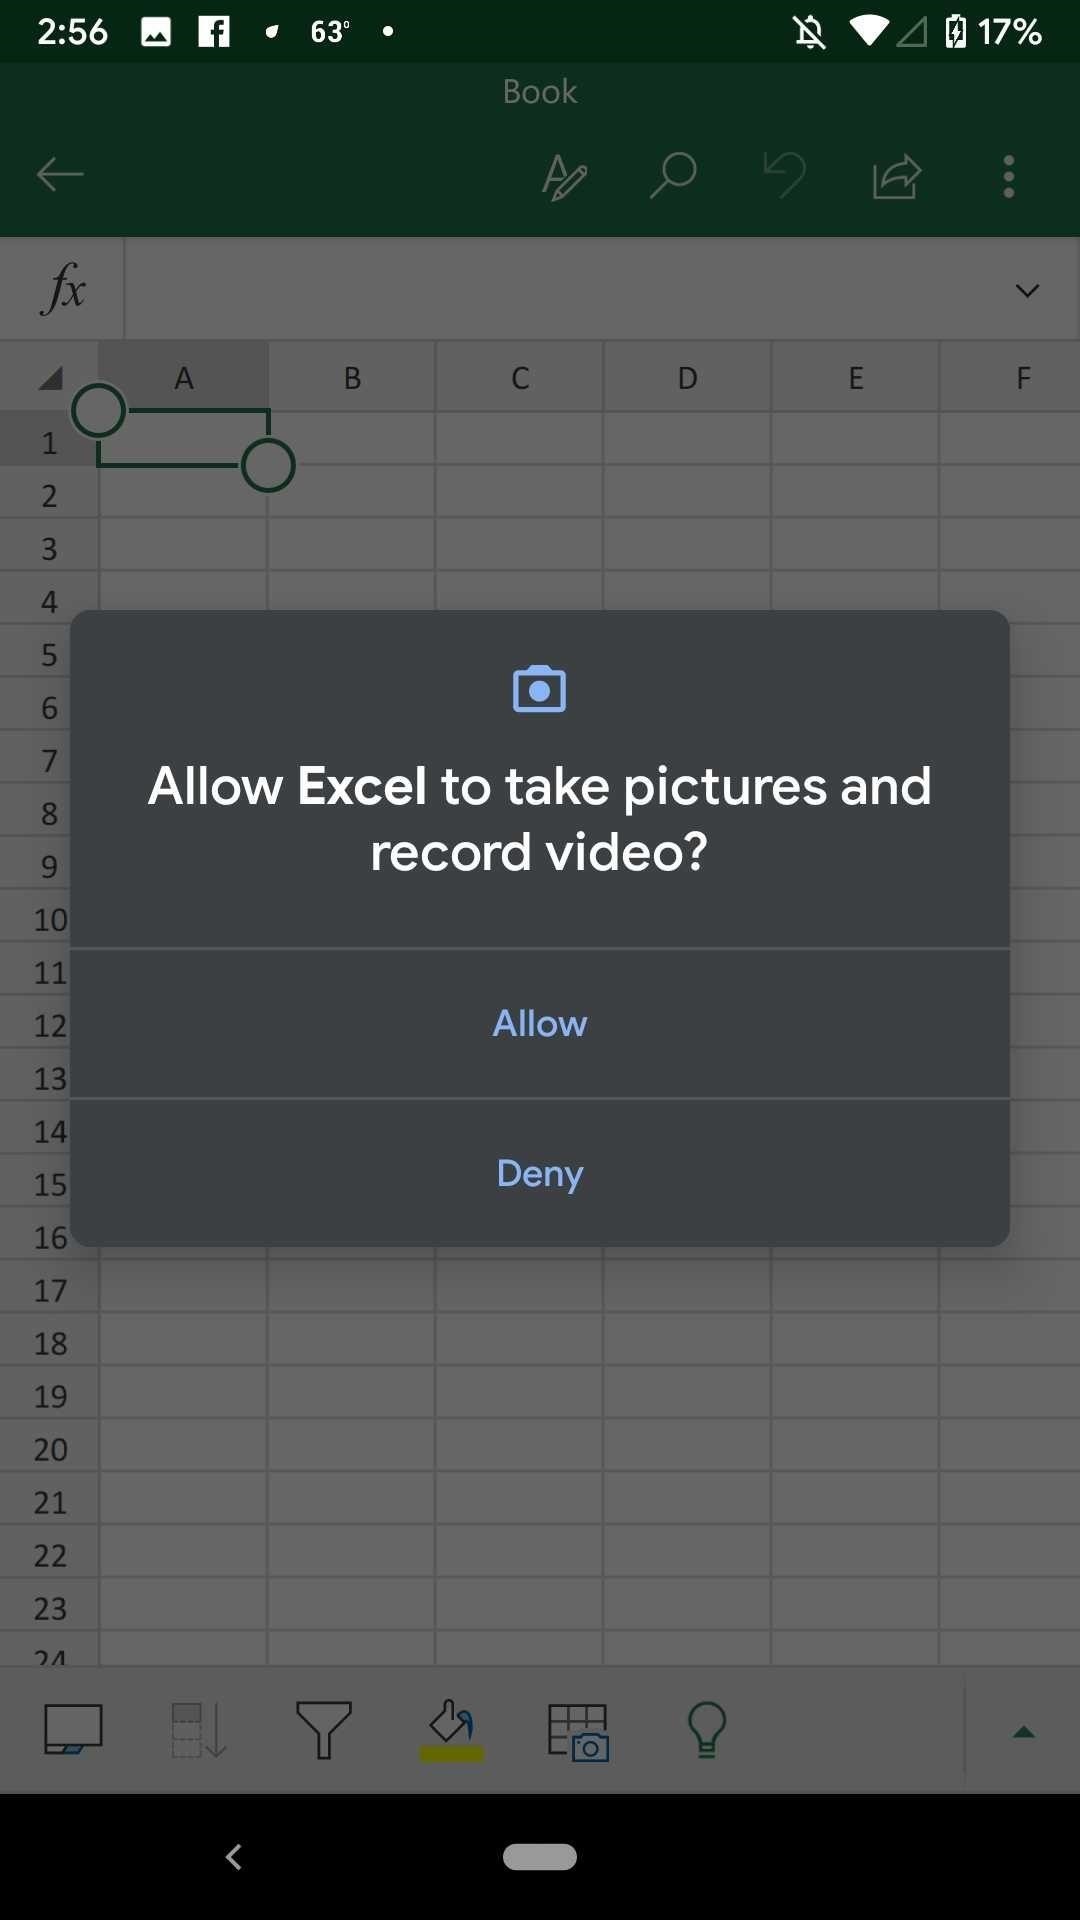
Once in your spreadsheet, make sure you highlight an available cell. Next, tap the spreadsheet icon with the camera in the bottom toolbar. Give Excel the proper permissions when prompted, if you haven't done so before, and you'll see the camera interface in Excel.


Here, you can line up your paper spreadsheet in the camera view. Excel will outline any areas it recognizes as a spreadsheet in red, so you'll know if you're on the right track. You can tap the flash icon in the top right to choose between flash, no flash, or auto-flash. When you frame it up correctly, tap the shutter button at the bottom.
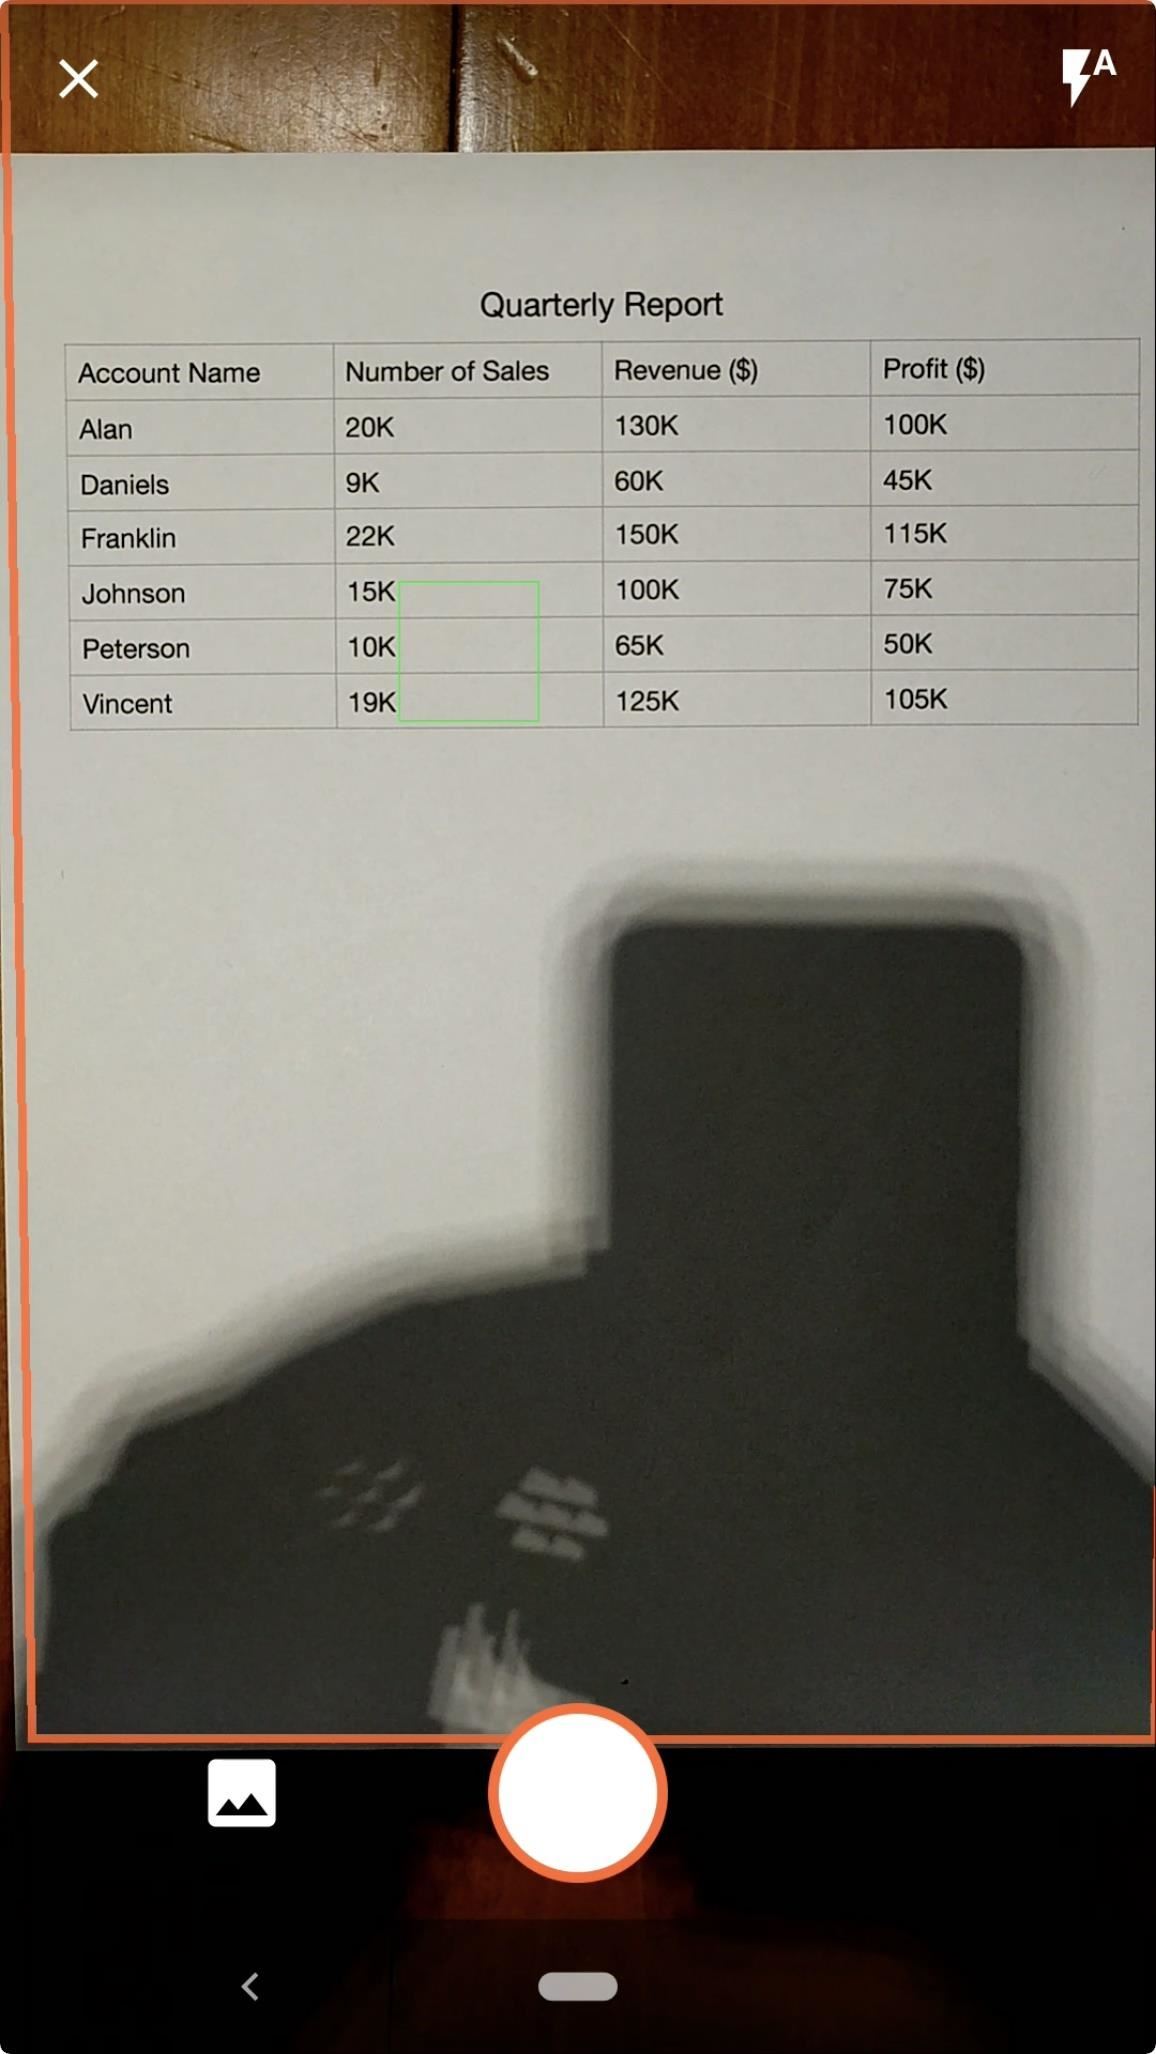

If you already took a photo of your spreadsheet and don't have access to the paper document anymore, you can choose it from your phone's gallery via the photo icon in the bottom left.
Step 3: Frame the Data in the Photo
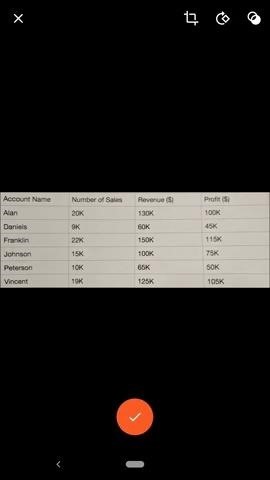
Once you snap or choose your pic, you can adjust the framing by tapping the crop tool at the top. Drag any of the tool's corners, and once finished, tap "Done." You can tap the rotate button to rotate your spreadsheet, and while there is a filter option, it doesn't appear any filters are available at this time. We're not sure why you would need filters anyway.
When your spreadsheet is cropped and rotated to perfection, tap the red checkmark at the bottom on Android or "Done" on iOS.

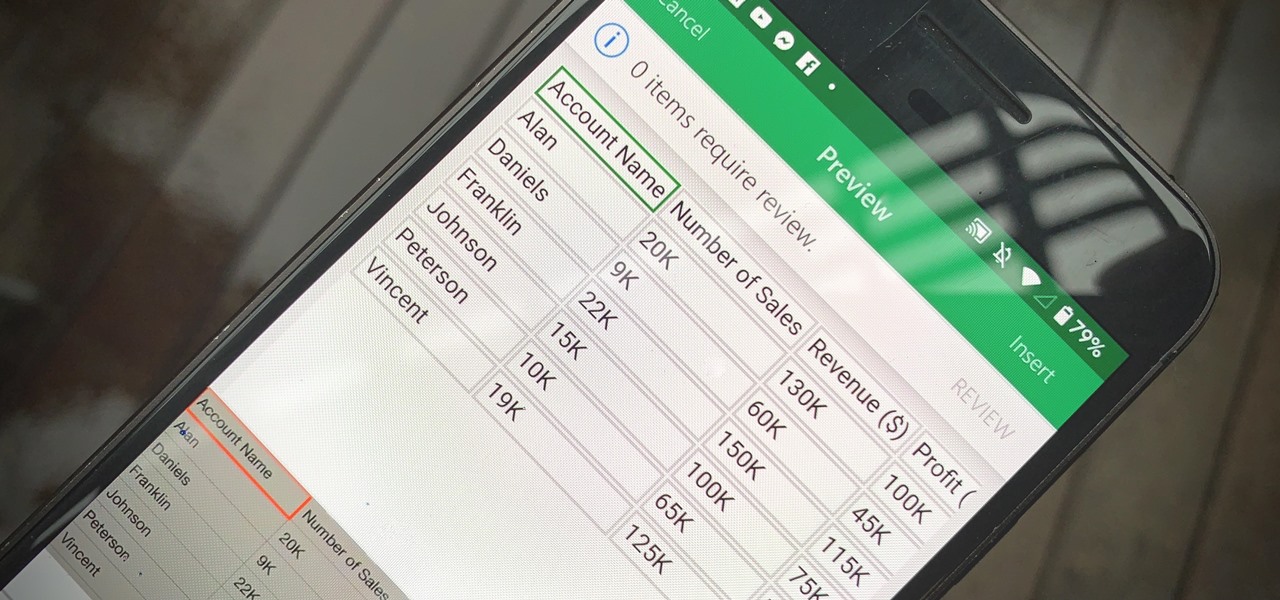
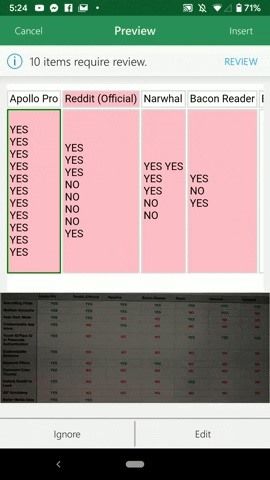
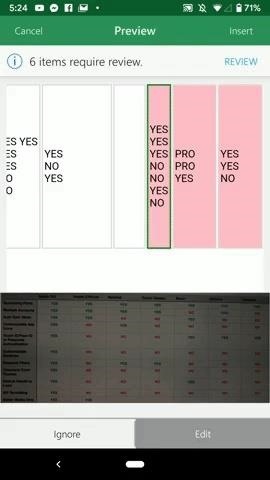
Step 4: Fix Any Errors
Once Excel takes it time to process your selected image, it will load it up in your mobile spreadsheet. First, however, it will present you with a preview of the data containing any errors or issues it encountered while doing the transfer. If the printed spreadsheet was simple enough, you might not see any problems here. However, if it was more complicated, you might see some issues.
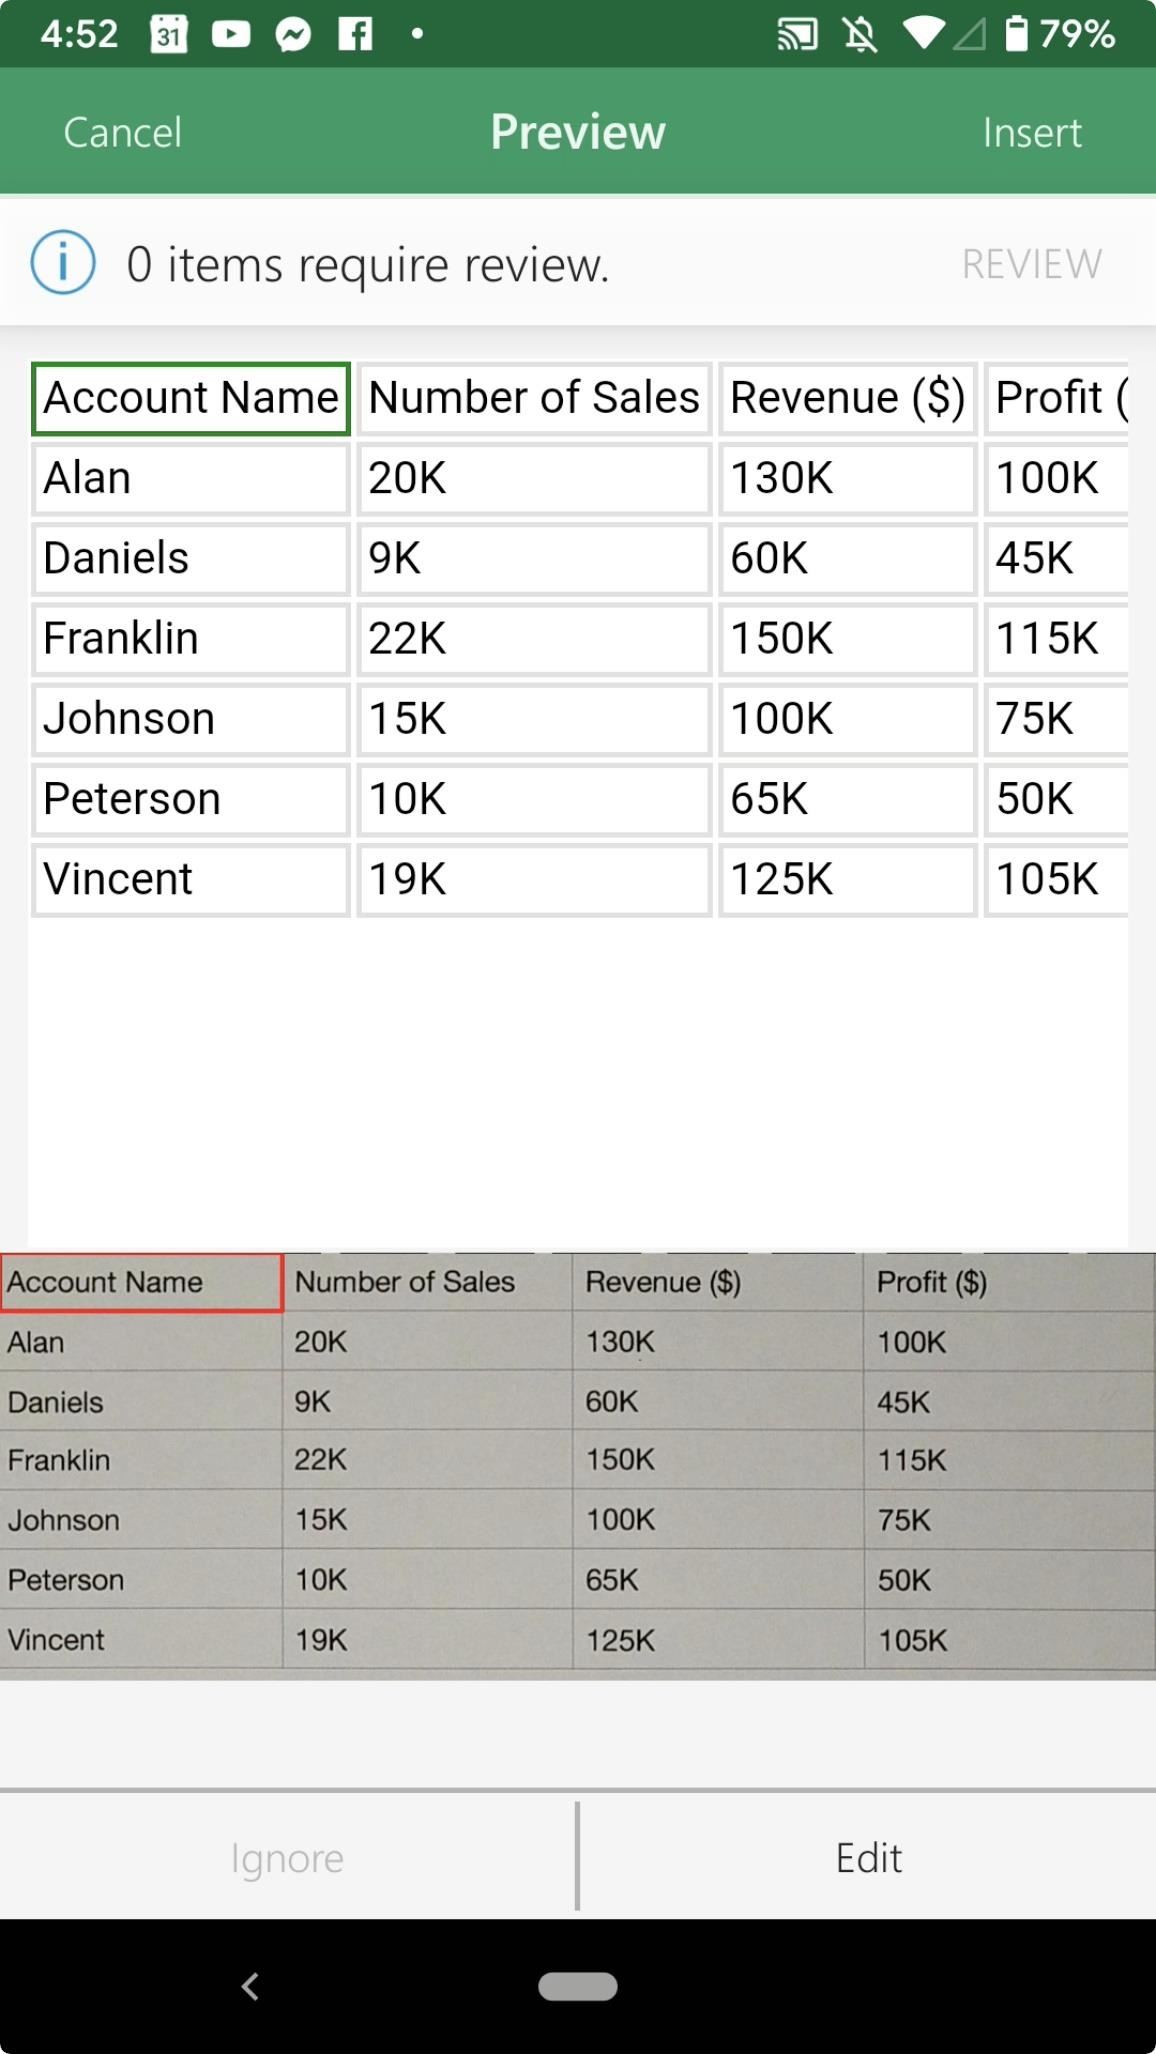
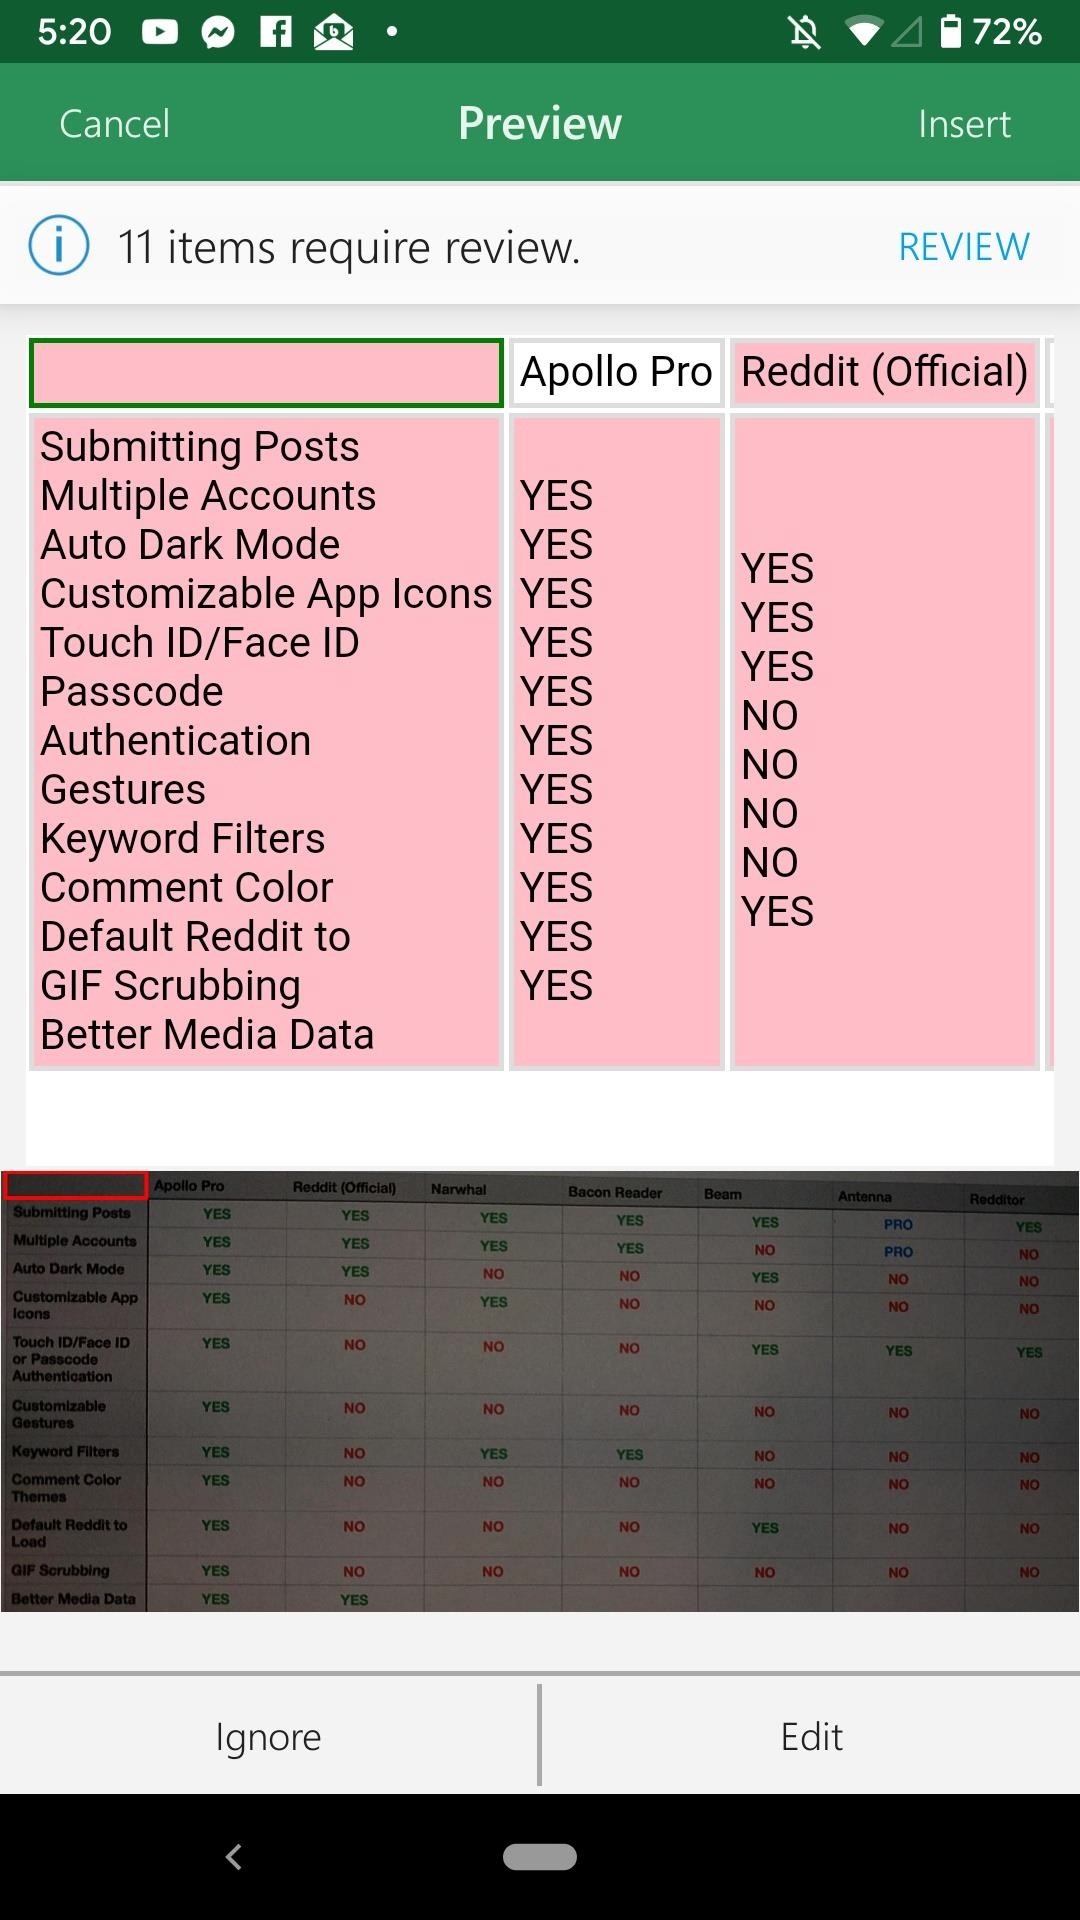
You can tap on any of these problem areas or cycle through them by tapping "Review." Tap "Edit" to tweak each cell, then "Done" when finished with that cell's edits. Tap "Ignore" to remove the pink label (Android only) from a cell. Once all the problems are gone, "Review" and "Ignore" will be grayed out. You can continue to edit any cell you'd like.
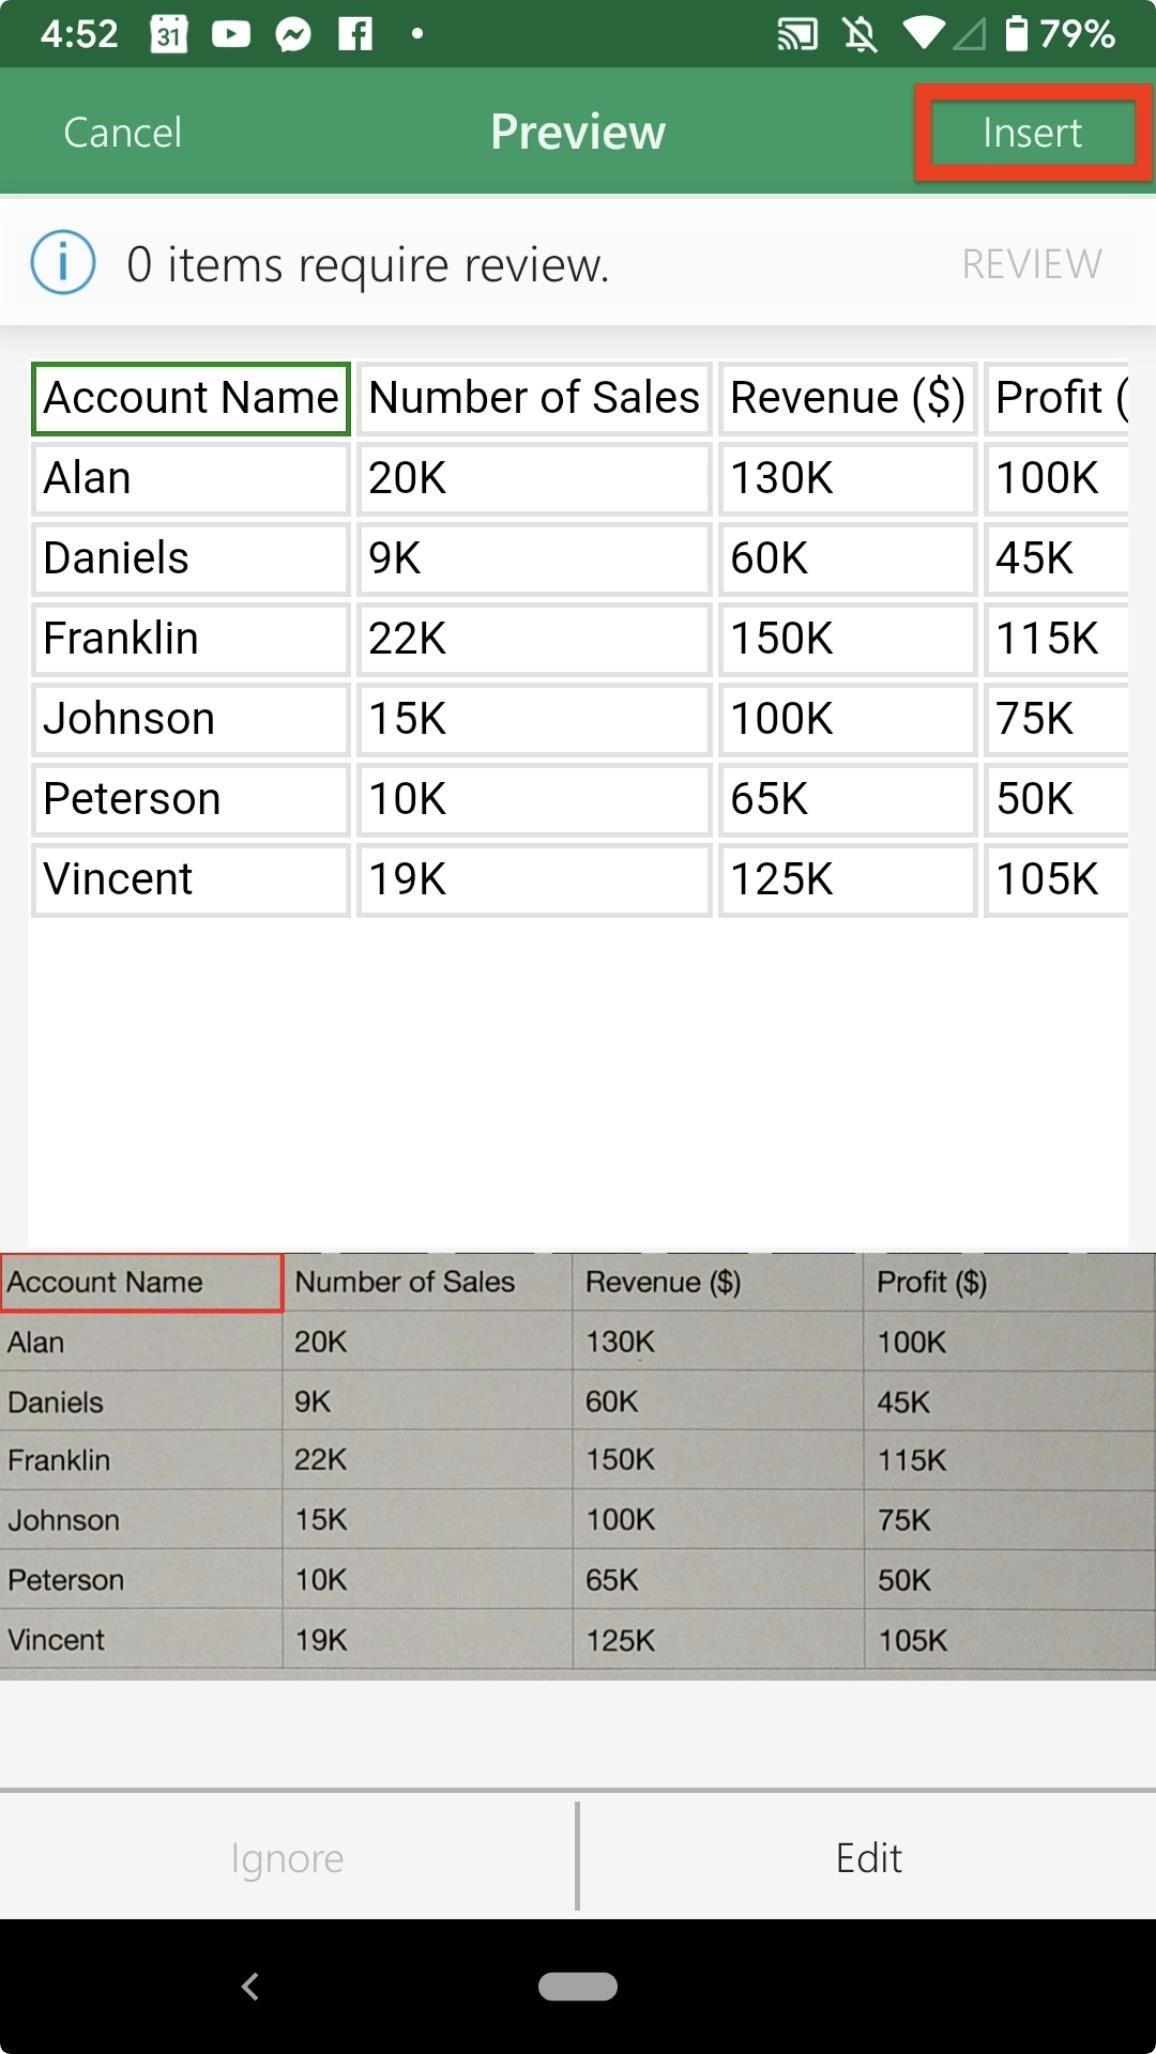
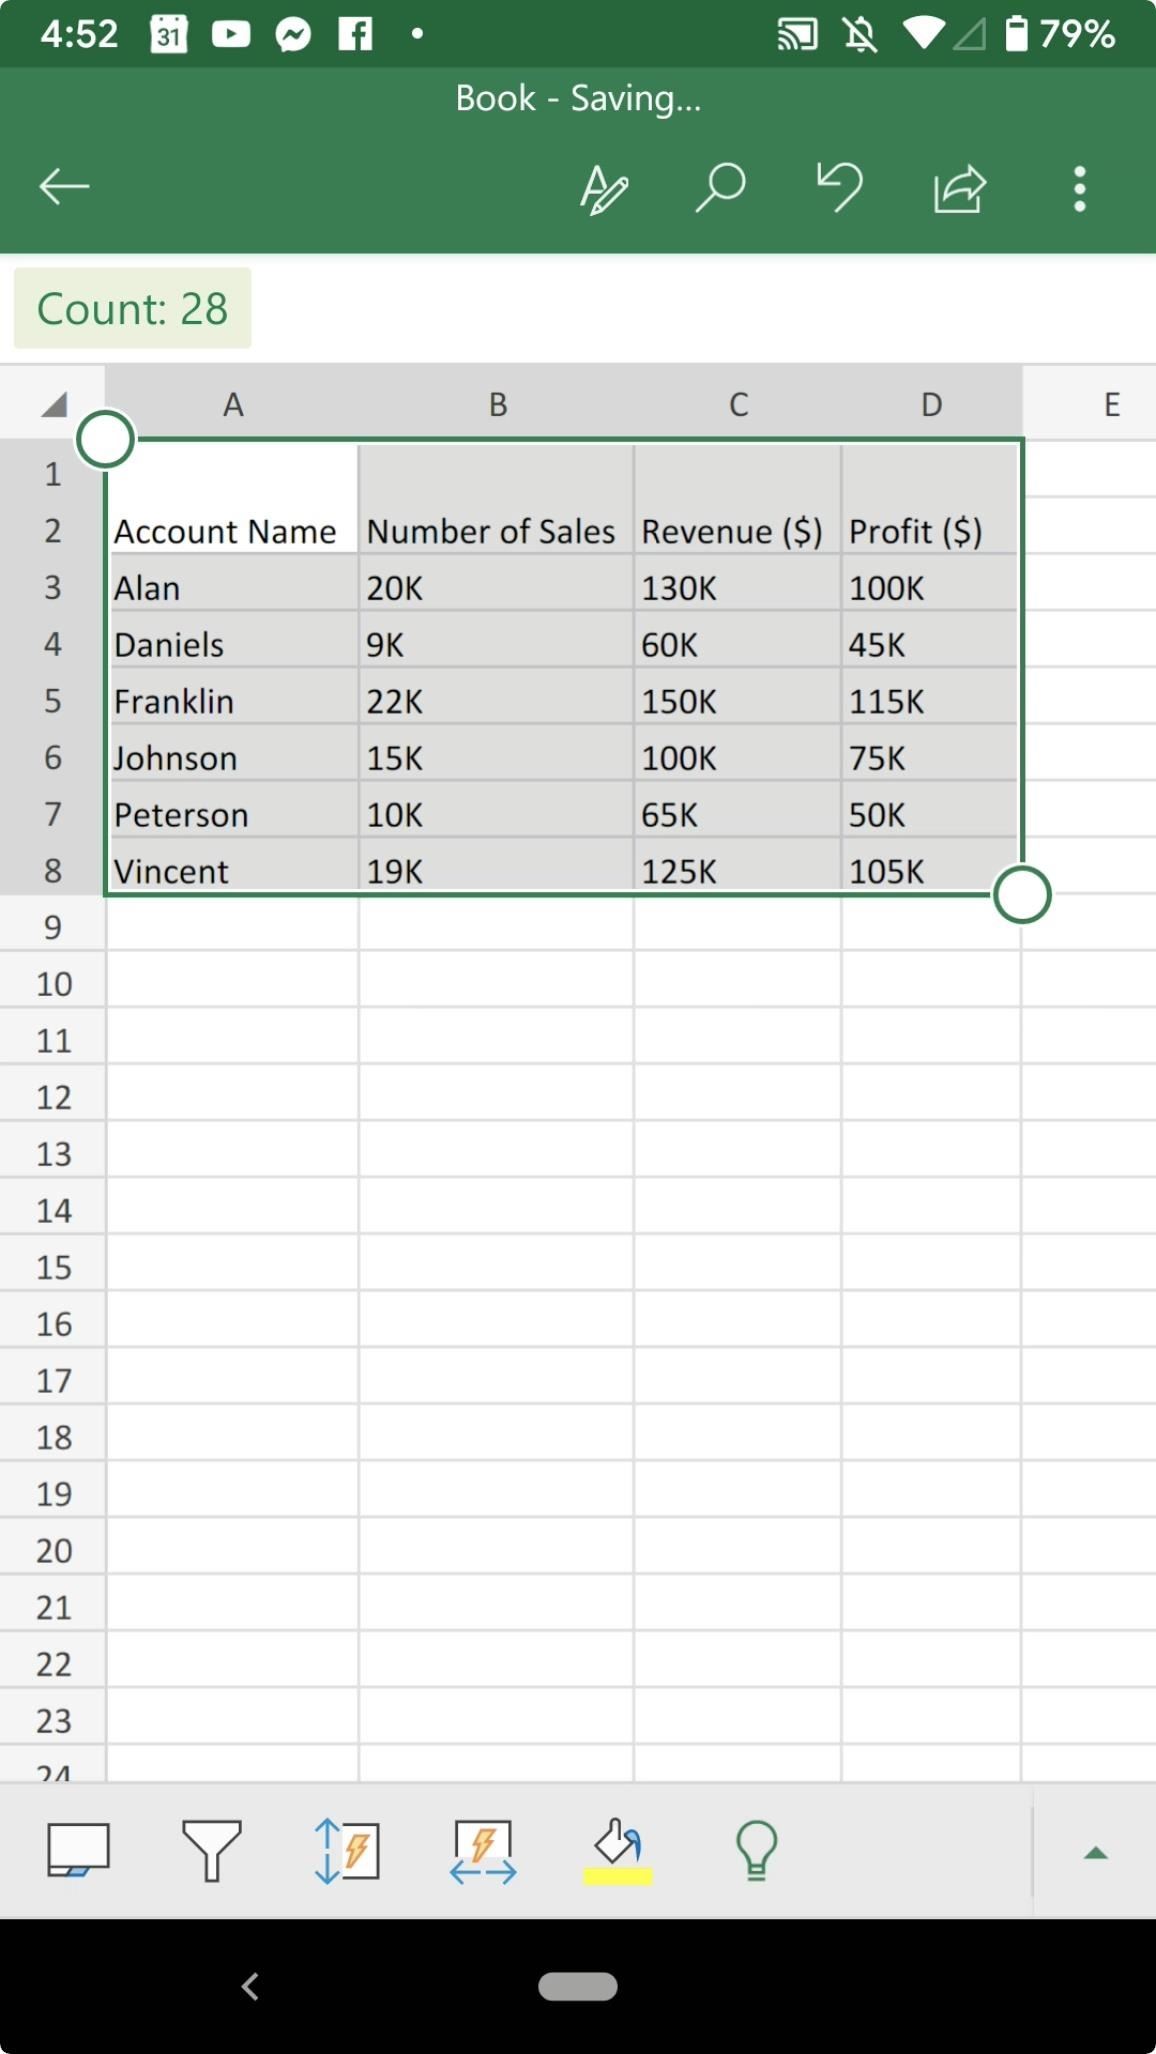
Step 5: Insert the Data into Your Spreadsheet
When ready, tap "Insert" to add the data to your spreadsheet. You can interact with this data just as you would any information you entered by hand. You can also repeat this process anywhere there is an open cell for you to do so.
Just updated your iPhone? You'll find new emoji, enhanced security, podcast transcripts, Apple Cash virtual numbers, and other useful features. There are even new additions hidden within Safari. Find out what's new and changed on your iPhone with the iOS 17.4 update.


Be the First to Comment
Share Your Thoughts